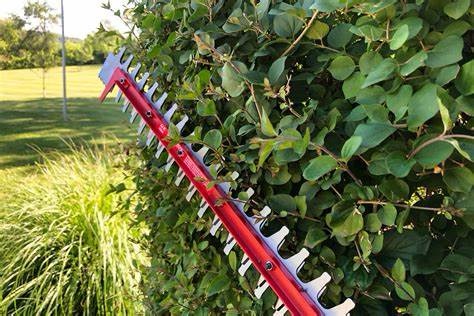
Neatly trimmed hedges are a hallmark of a well-maintained garden. Whether you’re defining boundaries, shaping privacy screens, or simply adding structure to your landscape, a hedge that’s cut straight and cleanly can transform the appearance of your outdoor space. However, achieving that perfectly even finish—especially by eye alone—is more difficult than it looks. Even experienced gardeners can fall victim to uneven cuts, slanted tops, or wavy sides. That’s why using a visual guide when trimming hedges is one of the most effective techniques you can adopt, especially if precision is your goal.
The eye can be surprisingly deceptive when judging straightness, particularly over longer distances or with irregular hedge shapes. Trimming “by feel” often results in one side being marginally higher than the other, or a gradual slope that becomes noticeable only once the job is finished. Once you’ve removed too much foliage, there’s no going back—so setting up a proper guide before trimming begins is an investment in quality and consistency.
A trimming guide doesn’t have to be complicated. In fact, a simple taut string stretched between two stakes at your desired cutting height is often enough to keep your lines straight and level. By aligning your trimmer’s blade just beneath the string, you create a uniform cut across the entire length of the hedge. This method is especially useful for long hedgerows or front garden borders where any imperfection is immediately visible from the street.
For vertical sides, you can hang weighted string plumb lines, or even use garden canes positioned upright at regular intervals as reference points. Some gardeners place canes on either side of the hedge and use horizontal string to create a rectangular “frame” they can follow with their trimmer. This is particularly useful when trimming formal hedges like yew, privet, or box, where symmetry and flat planes are essential.
Stepping back frequently is also part of using visual guides effectively. It’s easy to focus too closely on the section immediately in front of you and miss irregularities that emerge across the full length of the hedge. Every few metres, pause, walk around the hedge, and look at it from multiple angles. This habit allows you to spot inconsistencies early and correct them before they become permanent.
It’s also worth considering the role of physical guides—not just visual ones. Some long-reach hedge trimmers come with blade tilt angles and handle positions that help maintain a consistent cutting plane. If you’re using a telescopic hedge trimmer, adjust it so that it naturally holds at the right angle for your guide line. This reduces fatigue and helps you follow the guide without having to manually compensate for blade drift.
Trimming without guides can also lead to uneven growth patterns. When hedges are inconsistently cut, some areas receive more sunlight than others, which affects their density and health. The top of a hedge that leans to one side may cast excess shade on the lower branches, leading to thinning and gaps. A consistently shaped hedge allows for even light distribution, which in turn encourages fuller, more balanced growth over time.
Using a guide is especially important when you’re shaping hedges that act as garden features. Decorative topiary or box borders demand sharp edges and symmetry to stand out. Whether you’re trimming a spiral, a dome, or simply a tidy rectangular block, having a clear visual marker helps maintain the intended shape. This is where additional aids like cardboard templates or even laser guides come into play for more advanced gardeners.
Of course, not all hedges are perfectly level to begin with. Uneven ground, previous poor trims, or irregular growth can make it difficult to establish a baseline. In such cases, use a spirit level and string line to set a new reference point and slowly reshape the hedge over multiple trims. Trying to force a perfect cut in one go can result in over-pruning, especially with species that don’t recover well from aggressive cuts. Instead, aim for gradual correction, removing no more than a few centimetres at a time.
Weather conditions can also affect your ability to follow a guide. Bright sunlight and deep shadows can make string lines harder to see, while wind can cause them to sway. Choose a calm, overcast day for your trimming session when visibility is clear and movement is minimal. If you’re using electric or petrol trimmers, ensure you’re wearing appropriate safety gear and always remain aware of the guide’s position to avoid accidents.
Some gardeners find that trimming after rain gives a cleaner cut as the leaves are slightly more pliable, while others prefer dry conditions to avoid clumping and reduce the spread of debris. Whichever you choose, ensure your tools are sharp and well-maintained to produce smooth cuts that promote healthy regrowth. Blunt blades can tear rather than slice, leaving ragged edges that are prone to browning and disease.
It’s worth noting that using a guide doesn’t mean your hedge will be perfectly shaped on the first try—it’s a technique that improves with practice. Over time, you’ll develop a better sense of how your trimmer handles, how the hedge responds, and where minor adjustments are needed. As your confidence grows, you may find that you rely less on physical guides and more on trained visual judgment. Even then, having a string line or straight edge as backup remains a wise precaution, particularly when tackling long or prominent sections.
For those starting out or working with new tools, buying the right equipment can also make this task easier. Lightweight trimmers with blade guards, extendable poles, and adjustable angles all contribute to a more ergonomic, controlled experience. Reputable suppliers such as Garden Machinery Direct stock a wide range of tools suited to hedging tasks both big and small, and many also provide advice on technique and tool care.
Ultimately, hedge trimming is a blend of technique, patience, and preparation. Using a guide—whether it’s string, stakes, lines, or even visual landmarks—can help you achieve a consistent, professional look every time. It takes a little extra time to set up, but the results are cleaner lines, healthier hedges, and a much more rewarding gardening experience.
By making guides part of your trimming routine, you transform what could be an imprecise chore into a confident, measured process. And with each trim, your hedges will show the difference.